Are you ready to take your video editing skills to the next level? It’s not an easy task, but with practice and patience, you can become a pro in no time. Sure, it’s easy for me to say that while typing this from afar, but trust me, editing is hard work. However, with these tips and techniques, you can improve your confidence as an editor and land that next gig.
First things first, choosing the right editing software is crucial. It’s like picking the right car – they’ll all get you from A to B, but depending on your preferences, you might prefer one over the rest. Premiere Pro, Final Cut Pro, and DaVinci Resolve are currently the most popular professional video editing programs in the world. Each has its pros and cons, so it’s essential to do your research and pick the one that suits your needs.
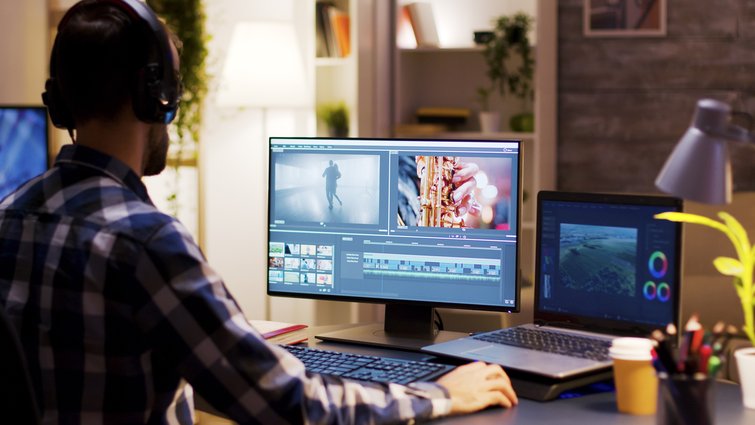
Once you’ve chosen your software, it’s time to pick the right computer. A faster computer will allow you to focus more on the story you’re trying to tell, rather than waiting for your computer to render. Everyone has their own opinions on what computer is best for editing, but it all depends on your preferences.
In conclusion, becoming a top-notch video editor takes time and effort, but with the right tools and mindset, you can achieve your goals. Keep practicing, keep learning, and keep editing. Who knows, you might just become the next big thing in the video editing world.Looking to take your video editing game to the next level? Look no further than these essential tips and tricks! First up, invest in a fast storage drive like an SSD. This will speed up your render, loading, and export times, making your workflow smoother and more efficient. And don’t forget to increase your RAM – the more, the better!
When it comes to picking your GPU and CPU, keep an eye out for the amount of memory and CUDA cores available. And while the Mac vs. PC debate rages on, remember that both systems are capable of producing top-quality video content.
But perhaps the most important tip of all? Master those keyboard shortcuts! Professional editors know that every second counts, and learning to navigate your software with ease will save you hours (if not days) in the long run. So print out a cheat sheet and get practicing!
Ready to take your video editing skills to the next level? Check out these helpful tutorial videos for Premiere Pro, Final Cut Pro X, and DaVinci Resolve. Happy editing!Are you ready to take your video editing skills to the next level? Here are some tips to help you become a pro! First, did you know that you can customize keyboard shortcuts in most video editing applications? That’s right, if you don’t like a certain key combination, you can change it to your liking. And if you’re looking for a way to learn your shortcuts, consider getting an editing keyboard cover. These covers have printed icons on them that you can slip over your keyboard, making it easier to remember all those shortcuts. Plus, they’re a lot cheaper than buying a whole new keyboard!
But it’s not just about the tools you use, it’s also about the language you speak. Video editing has its own set of terms and concepts that you should know to communicate effectively with other editors and clients. For example, do you know what a jump cut is? It’s a cut that allows you to remove boring parts of a video without losing visual interest. And have you heard of J and L cuts? These are essential for tying two scenes together, and they can add a lot of visual interest to your video.
Another important concept to know is the montage. This is a sequence of shots that demonstrates the passage of time and can help progress your story. And finally, there’s match action, a technique where you cut from one visually similar scene to another. With these tips and concepts in mind, you’ll be well on your way to becoming a video editing pro!Get ready to take your video editing skills to the next level! Have you ever wondered how to make your scenes more visually interesting? Cutting on action is a simple technique that can make a huge difference. By cutting in the middle of an action, your scene will appear more fluid and less jarring. And don’t forget about the importance of sound! As David Lynch once said, films are 50% visual and 50% sound. So, make sure your project has good sound by licensing music from a royalty-free provider. And when it comes to exporting for the web, keep in mind the four main factors that determine your video’s size: codec, resolution, bit rate, and frame rate. With these tips and tricks, you’ll be on your way to creating high-quality videos that will captivate your audience.
YouTube
Are you a video editor looking to get your work seen by the masses? Look no further than YouTube, the most popular video service in the world. But with TikTok on the rise, is YouTube still the reigning champion? It’s hard to say. One thing to keep in mind is that when you upload a video to YouTube, it will be re-encoded to a smaller file format, resulting in a loss of quality. So, make sure to preview your video before publishing it to ensure it looks its best.
| Max Resolution | 8K |
| Recommended Codec | H.264 |
| Audio Codec | AAC-LC up to 96khz |
| Bit Rate Recommendations | 4K 45mbps at 24fps |
| Frame Rate Support | 24, 25, 30, 48, 50 & 60 |
Vimeo
Vimeo is a beloved video streaming service among industry professionals, but with so many options available, it’s hard to say if it’s still the go-to platform. One thing to keep in mind when exporting video on Vimeo is that your video will be re-encoded and lose quality. However, Vimeo’s sleek design and ad-free model make it perfect for non-obstructed viewing. If quality is a major concern, you can direct your audience to download the original file by clicking the download button below your video.
Here are Vimeo’s compression guidelines:
| Max Resolution | 8K UHD |
| Recommended Codec | H.264, ProRes 422, H.265 |
| Audio Codec | AAC-LC at 48khz |
| Bit Rate Recommendations | 30-60 |
| Frame Rate Support | 24, 25, 30, 60 |
Facebook and Instagram
With over ten different ways to upload a video to Facebook and Instagram, it’s best to check out their page for specific requirements. Most major NLEs have presets built-in for YouTube, Vimeo, and Facebook, so you likely won’t have to export your video manually. Before publishing your video, be sure to watch it on both a phone and computer to ensure it looks good on multiple screens and speakers.
7. Tips for Faster Editing
Want to become a faster video editor? While it won’t necessarily make you a better editor, it will allow you to try more things in less time, resulting in better films and videos. Here are a few tips:
Organization Is Everything!
Take the time to organize your projects and files well. A little time spent labeling and organizing your footage can save you hours of wasted time on a project. One popular way to organize footage is to use the following folder structure:
- Footage
- Project Files
- Titles/Animations
- Audio
- Images
Each section can have even more subsections, depending on the size of your projects. For example, under the Audio folder, you may have music, SFX, mic audio, and soundscapes. At the end of the day, project organization is all about keeping your resources in one place. Do what works best for you!
External Hard Drives

Hard drive speed is crucial for fast render times, but there are a few things you can do to speed up your editing process. First, purchase a fast external hard drive to store your footage. When picking a hard drive, consider whether it needs to be plugged into a wall or not to work. Typically, wall-plug-based hard drives are cheaper, but they can be a pain to deal with if you ever need to take your hard drive somewhere besides your editing bay.
- Why You Want to Use Both SSD and HDD for Video Storage
Looking to take your video editing skills to the next level? Here are some tips to help you optimize your workflow and create stunning videos:
Allocate Your RAM
Don’t let your computer’s RAM go to waste! By default, most NLEs only use a few gigs of RAM at a time, so be sure to adjust your preferences to allocate more RAM for your video editing application. Check out these links to learn how to do it in Premiere Pro and FCPX:
- Allocating RAM in Premiere Pro
- Allocating RAM in FCPX
Choosing the Right Mouse
Using a gaming mouse with programmable buttons can save you precious seconds while editing. Check out this Logitech mouse or any other gaming mouse with programmable buttons to perform basic video editing tasks with ease.
Close Out Other Programs
Make sure to close out all other applications while editing to free up memory and reduce strain on your CPU. This will help prevent slow performance and ensure a smooth editing experience.
8. Color Considerations
Color Correction
Get your footage to a color baseline with basic color correction. Most NLEs have built-in color correction effects that make it easy to perform basic color correction. Keep in mind that highly-compressed codecs like H.264 and AVC-HD may limit your ability to manipulate colors.
Color Grading
Stylize your footage to match a given color “look” with color grading. There are two types of grading: grading with presets and grading by hand. While presets are a quick and easy option, manually grading your footage will result in a more professional and polished look. Check out DaVinci Resolve, the most popular software for color grading.
Color Grading with Presets
Color grading presets, also known as LUTs, can give your footage distinct and fun looks without spending a lot of time making them. However, be sure to scan through your footage to look for color problems and avoid simply applying a preset look and clicking export.
- Download 13 FREE Cinematic LUTs
- 65+ Free Cinematic Looks
- 29 Free LUTs for Video
Color Grading by Hand
If you have the time and skill, manually color grading your film will result in superior results. Change every little thing about your image to achieve the perfect look. Check out this tutorial on color matching in Premiere Pro to get started.
“Unleash Your Creativity with Stunning Titles and Graphics!”
Are you ready to take your video editing skills to the next level? After all the hard work of editing, adding music, and color grading, it’s time to add the finishing touches with eye-catching graphics. But creating good graphics can be surprisingly difficult. That’s why we’re here to help.
First things first, keep it simple. Pre-built titles and animated graphics are a great starting point. They’re free and look fantastic. Once you feel more comfortable, you can start experimenting with new fonts and designs. Check out “The 101 Best Free Fonts on the Web” for inspiration.
But if you really want to take your graphics to the next level, it’s time to learn After Effects. This program allows you to create amazing motion graphics and VFX work. And the best part? It’s a lot of fun to learn. Take it one step at a time and be methodical. Check out the awesome resources available online, like the video we’ve included here.
And don’t forget, video editing is a process that takes time to master. Luckily, there are countless free resources available online to help you become the best editor you can be. Check out PremiumBeat’s blog, “The Beat,” for original video editing and post-production articles every week. And for more on video editing, be sure to visit our page where new articles are added regularly.
So what are you waiting for? Unleash your creativity and start creating stunning titles and graphics today!
Other Articles


